Pruning schemes

One diagram per plant showing exactly where the cuts go, with the steps written out underneath.

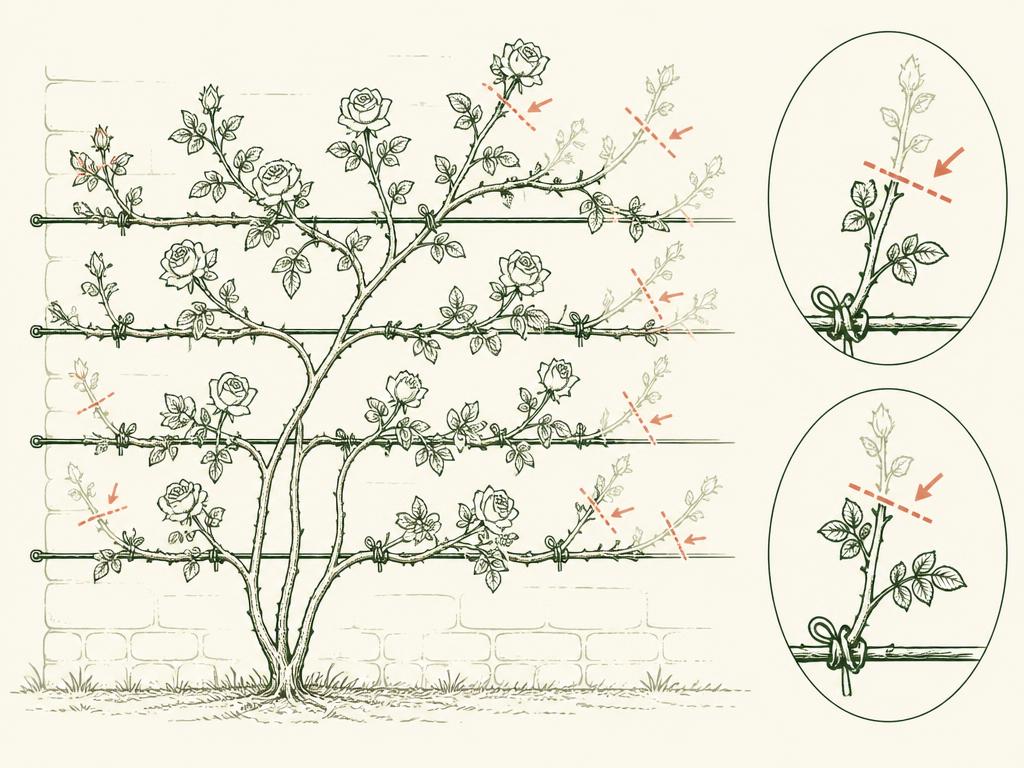
Iceberg Climbing Roses

01 · December – February

Iceberg Climbing Roses

Pruning diagram for Iceberg Climbing Roses: red dashed lines mark where to cut
Red dashes = cut here.Main stems stay and get tied along the wires. The flowered side shoots are cut back by about two thirds, at the red marks.
  1. 1Remove dead, diseased or damaged wood.
  2. 2Remove any crossing or rubbing stems.
  3. 3Cut side shoots that flowered back by about two thirds.
  4. 4Keep strong main climbing stems and tie them in to new growth.

Cut above a strong outward-facing bud.

Year plan for this plant
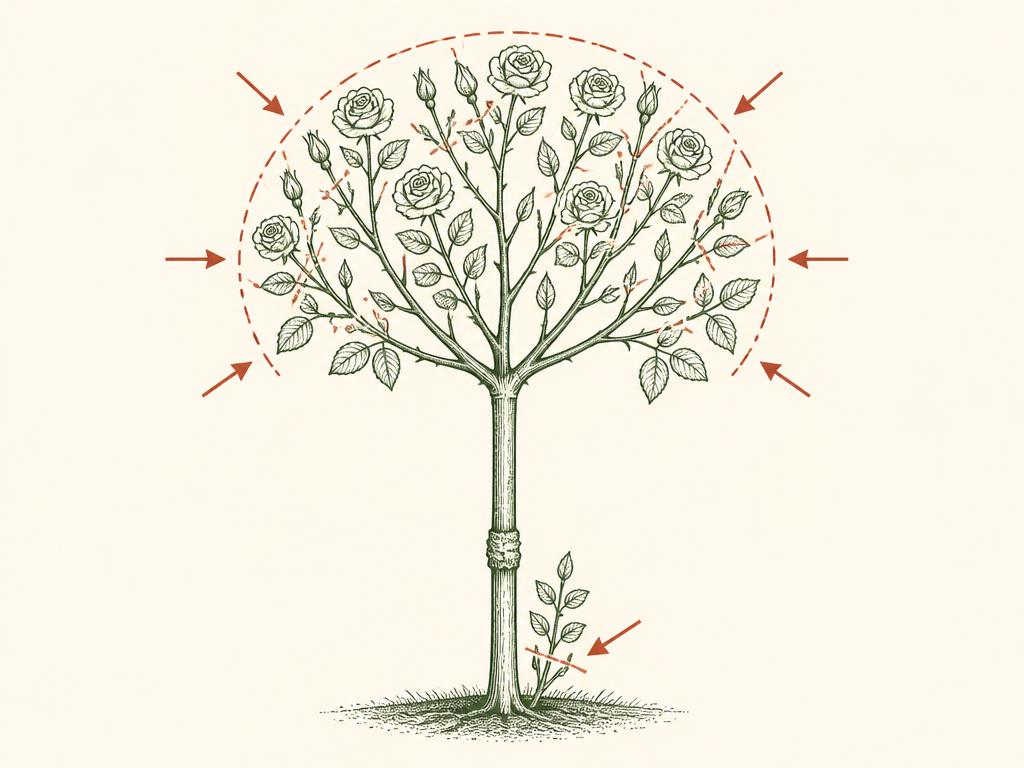
4 Rose Trees

02 · March

4 Rose Trees

Pruning diagram for 4 Rose Trees: red dashed lines mark where to cut
Red dashes = cut here.Shorten the head evenly to keep the dashed rounded outline, and cut off any shoot sprouting from the stem below the graft.
  1. 1Remove dead, diseased or weak growth.
  2. 2Remove any shoots growing from the stem below the graft.
  3. 3Shorten remaining shoots to maintain a rounded head, by roughly 20–30 cm (8–12 in).

Cut back to an outward-facing bud.

Year plan for this plant
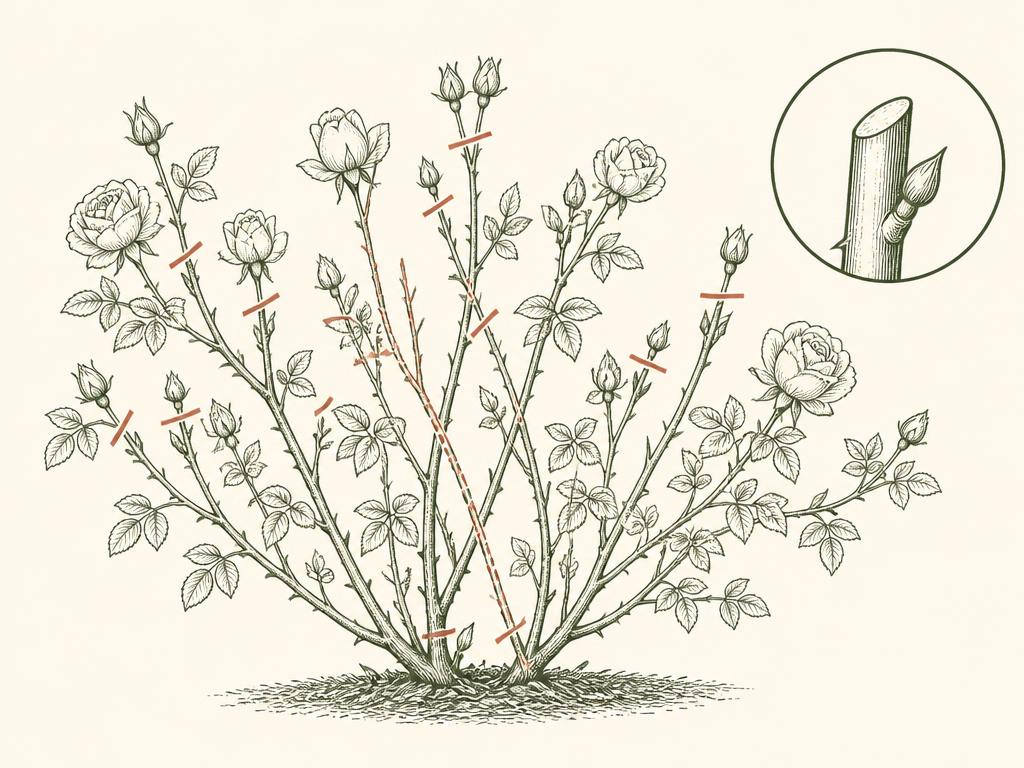
Other Roses

03 · March

Other Roses

Pruning diagram for Other Roses: red dashed lines mark where to cut
Red dashes = cut here.Take out dead and crossing stems at the base, then shorten what is left by a third. The inset shows the angled cut above an outward-facing bud.
  1. 1Remove dead, weak or crossing stems.
  2. 2Shorten remaining stems by about a third to a half.
  3. 3Aim to take 15–25 cm (6–10 in) from the base of each stem you shorten.

Cut above an outward-facing bud.

Year plan for this plant
Hydrangeas

04 · March – April

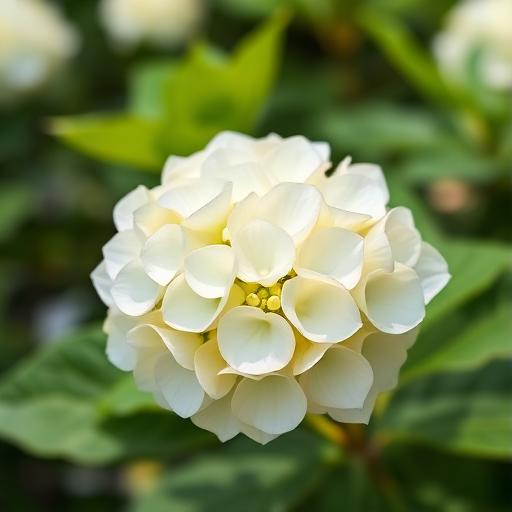
Hydrangeas

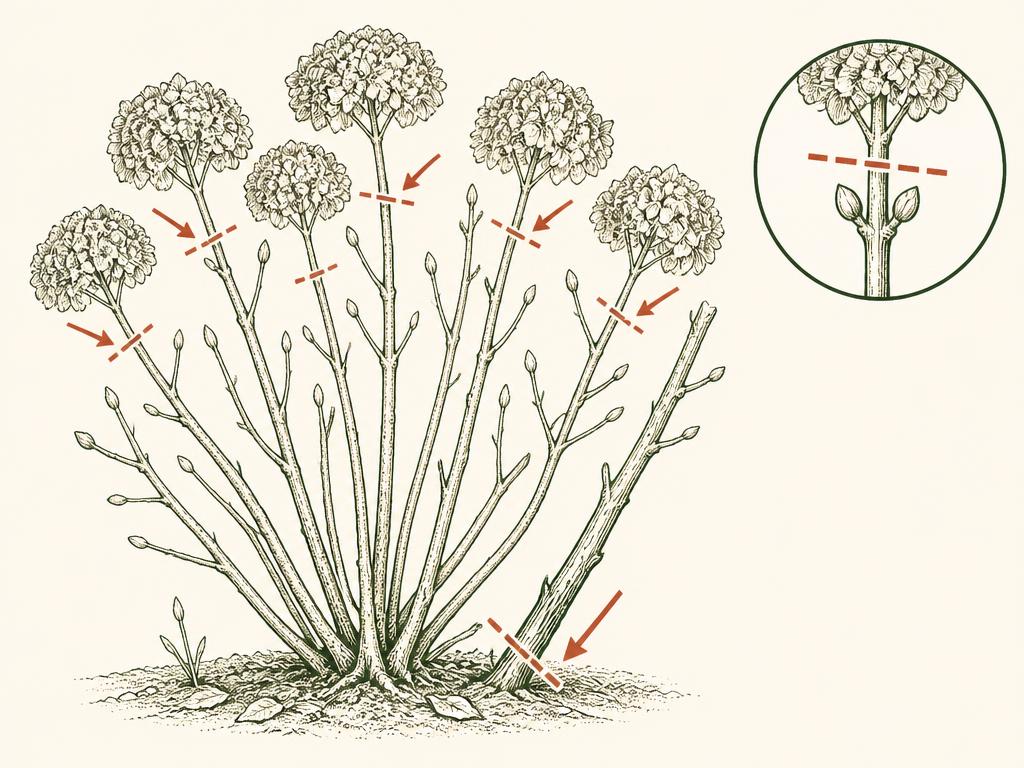
Pruning diagram for Hydrangeas: red dashed lines mark where to cut
Red dashes = cut here.Cut each old flower head down to the first strong pair of buds (inset), and remove one or two of the oldest stems at ground level.
  1. 1Leave last year's flower heads on over winter as frost protection.
  2. 2Cut each flower head back to the first strong pair of buds.
  3. 3Remove one or two of the oldest stems at ground level on established plants.

Cut 5–10 cm (2–4 in) above healthy buds.

Year plan for this plant
Lilies

05 · After flowering

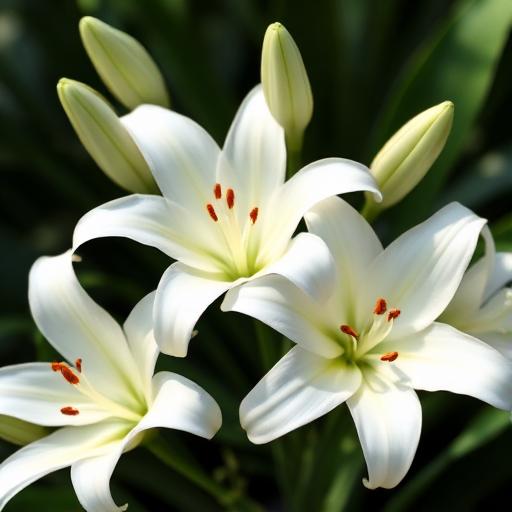
Lilies

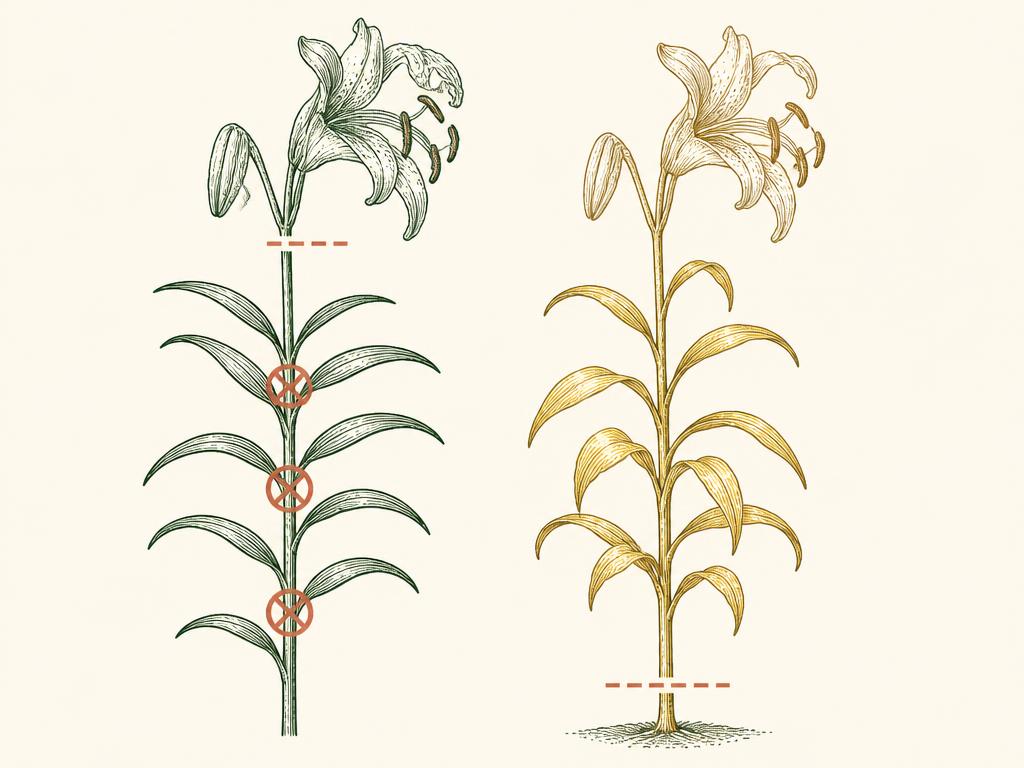
Pruning diagram for Lilies: red dashed lines mark where to cut
Red dashes = cut here.Snip the faded flower off the top only. Never cut green leaves or stems — wait until the whole stem is yellow, then cut low.
  1. 1Deadhead the faded flowers.
  2. 2Do NOT cut the green stems or leaves.
  3. 3Let the foliage yellow naturally to feed the bulb.
  4. 4Cut stems down only when fully yellow or brown.
Year plan for this plant
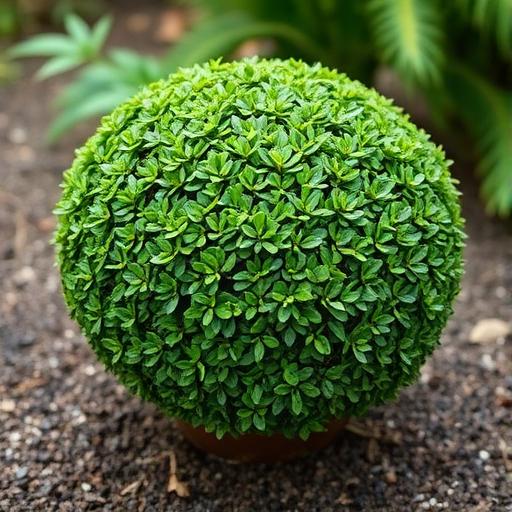
Boxwood (Buxus)

06 · August — main trim

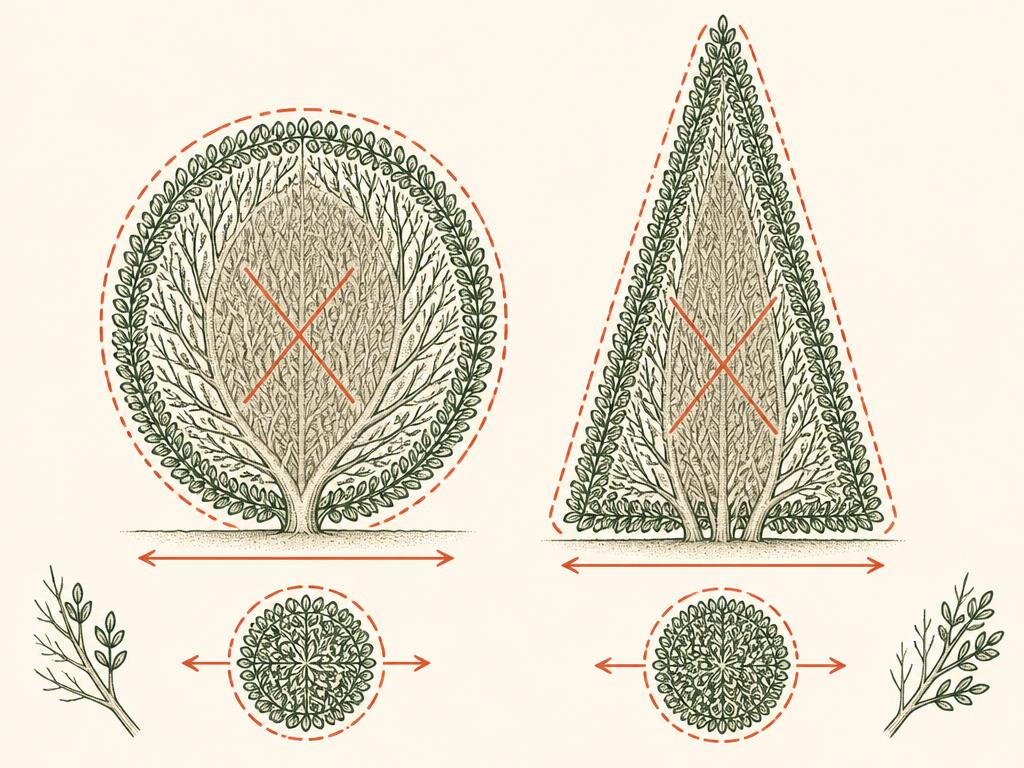
Boxwood (Buxus)

Pruning diagram for Boxwood (Buxus): red dashed lines mark where to cut
Red dashes = cut here.Trim only the green outer shell along the dashed line, keeping the base wider than the top. The crossed inner area is old bare wood — never cut into it.
  1. 1Use sharp shears.
  2. 2Trim the outside of the shrub to the desired shape.
  3. 3Keep the base slightly wider than the top.
  4. 4Avoid cutting into old, bare wood.

Keep the top narrower than the base.

Year plan for this plant
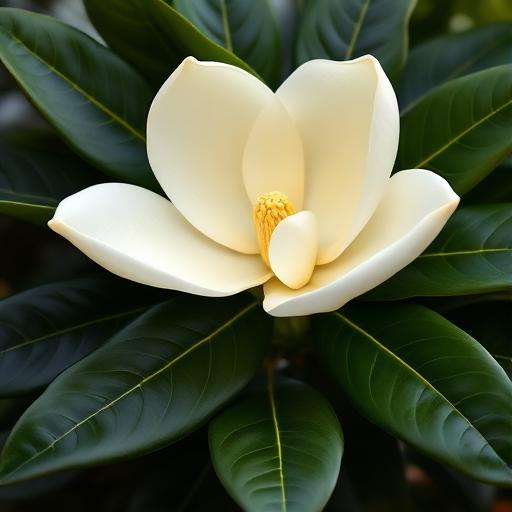
Magnolia Grandiflora 'Little Gem'

07 · Late summer, if needed

Magnolia Grandiflora 'Little Gem'

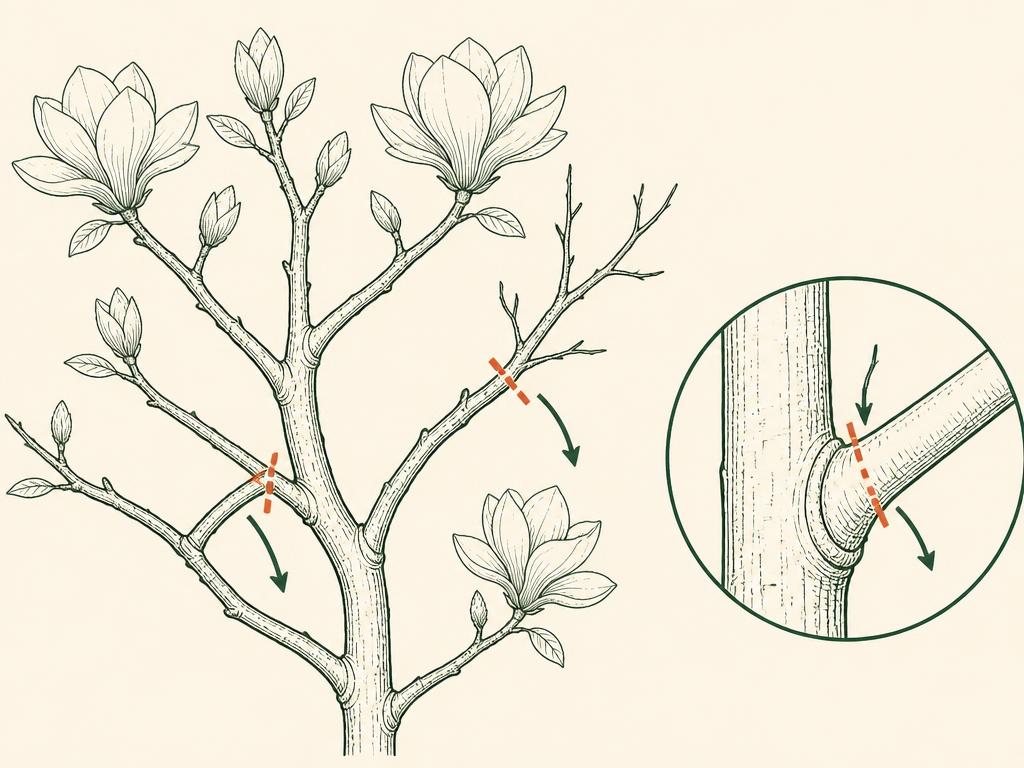
Pruning diagram for Magnolia Grandiflora 'Little Gem': red dashed lines mark where to cut
Red dashes = cut here.Remove dead or crossing branches back to a side branch. The inset shows cutting just outside the swollen branch collar.
  1. 1Remove dead, damaged or crossing branches.
  2. 2Cut back to a side branch or main stem.
  3. 3Do not top or prune heavily.

Cut back to a side branch.

Year plan for this plant
Magnolia 'Fairy Honey Velvet'

08 · After flowering

Magnolia 'Fairy Honey Velvet'

Pruning diagram for Magnolia 'Fairy Honey Velvet': red dashed lines mark where to cut
Red dashes = cut here.Light shaping only, straight after flowering. Cut back to a side branch just outside the branch collar (inset).
  1. 1Remove dead, damaged or crossing branches.
  2. 2Lightly shape if needed.
  3. 3Light pruning only — never hard cuts.
Year plan for this plant
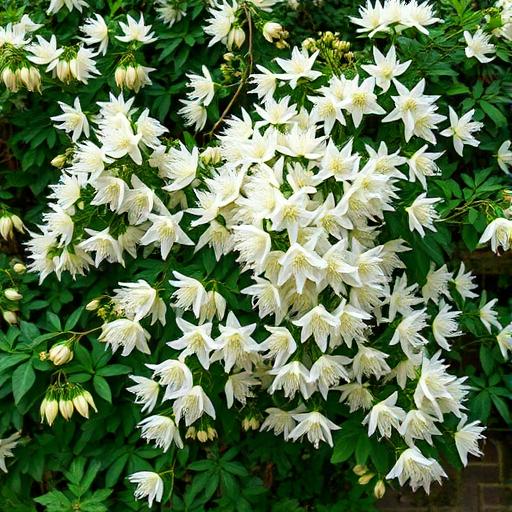
Clematis 'Avalanche'

09 · After flowering — April / May

Clematis 'Avalanche'

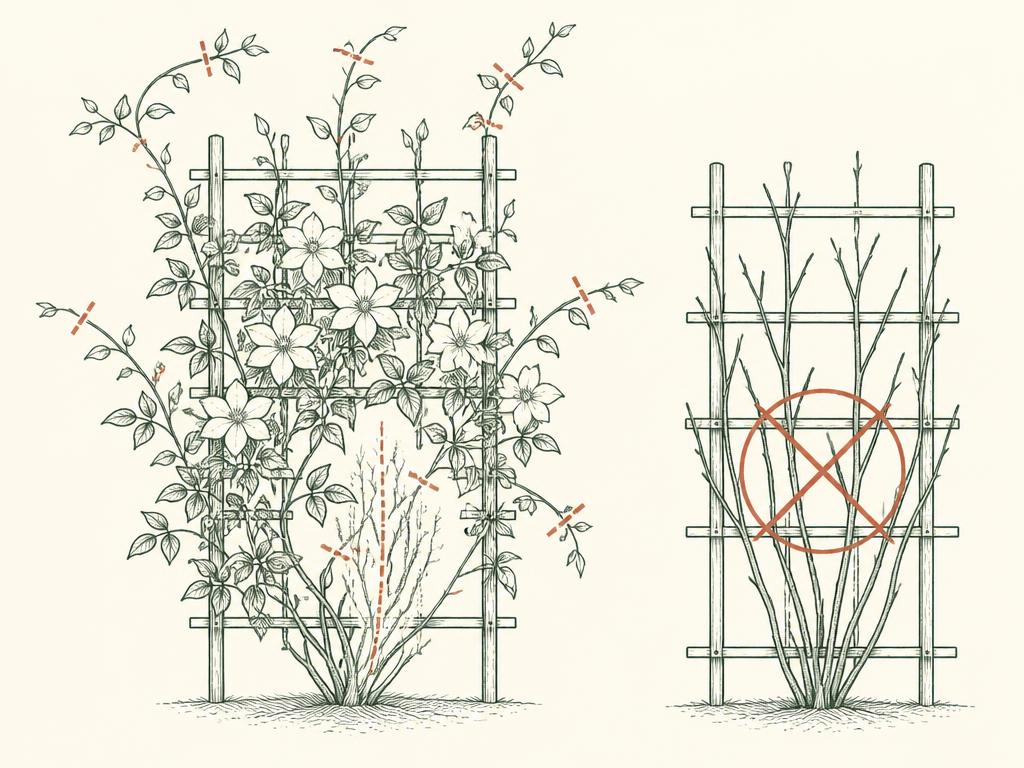
Pruning diagram for Clematis 'Avalanche': red dashed lines mark where to cut
Red dashes = cut here.Prune right after flowering: tidy weak stems and shorten long ones. The bare winter plant on the right must be left alone.
  1. 1Remove dead or weak stems.
  2. 2If needed, shorten long stems by 20–30 cm (8–12 in).
  3. 3Do NOT prune in winter or early spring.
Year plan for this plant
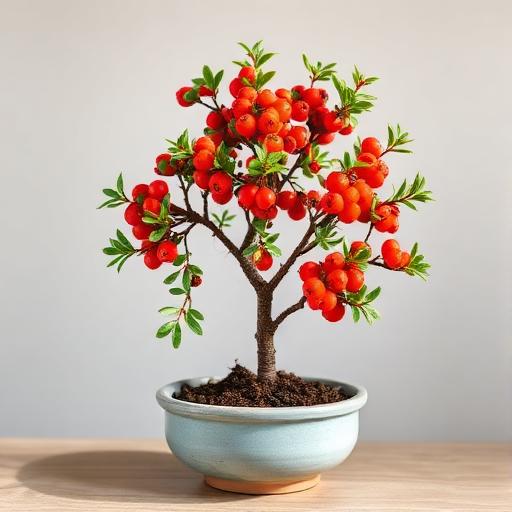
Pyracantha Bonsai

10 · Shape through the growing season

Pyracantha Bonsai

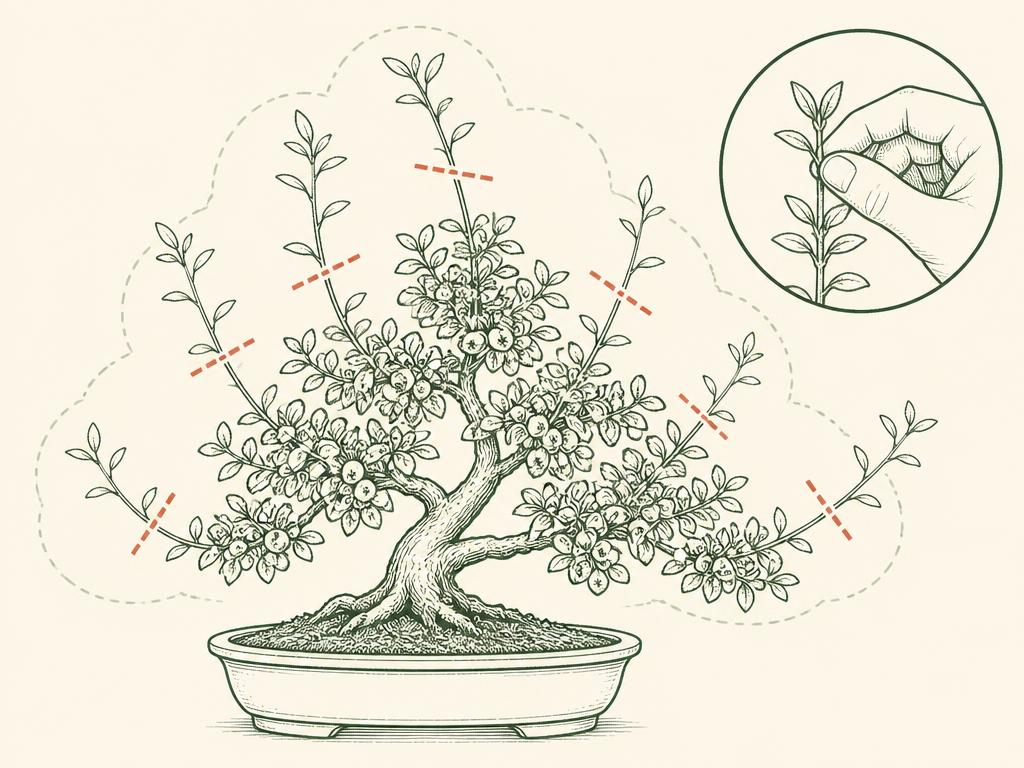
Pruning diagram for Pyracantha Bonsai: red dashed lines mark where to cut
Red dashes = cut here.Cut long shoots back to two to four leaves so the tree stays inside the dashed silhouette, and pinch soft new tips by hand (inset).
  1. 1Remove long, unwanted shoots.
  2. 2Prune back to two to four leaves.
  3. 3Pinch out strong new growth to maintain shape.
  4. 4Keep the outline balanced and tidy.

Two to four leaves above the cut.

Year plan for this plant

About pruning wounds

For most of these plants you do NOT need to apply sealant or paste to pruning cuts. Clean cuts made with sharp tools heal naturally.

Tools you’ll need

  • Secateurs (bypass type)
  • Loppers
  • Hedge shears
  • Hand saw (for thicker branches)
  • Bonsai scissors
  • Gloves
  • Twine / plant ties
  • Sharpening stone or file

Six habits that keep a garden healthy

  • Use clean, sharp tools.
  • Water well in dry spells, especially in summer.
  • Mulch in spring or autumn to protect roots and retain moisture.
  • Feed as recommended — do not over-fertilise.
  • Check plants regularly for pests or disease.
  • Prune on dry days, not in wet or very cold weather.